Friday 1 April 2016

How To Make Macaroni and Cheese - from scratch!


 We love macaroni and cheese here at our house!

I often receive complements for my recipe.
Kids love it!
Adults love it!
And it can be made as fast as the stuff sold in a box.
Awesome!!


I first posted this recipe back in August of 2015.  You can read it again by clicking THIS LINK.
It was a great recipe then.  But, not being one to rest on my laurels, I reworked the recipe and made it EVEN BETTER!
We are also a family that deals with the day to day difficulties of dietary allergies and intolerances.  My new reworked recipe accounts for several allergies/intolerances by offering different options for ingredients.  Count your many blessings if you are able to eat all foods without side effect!  And without further ado, the recipe...


Macaroni and Cheese from scratch!

Ingredients - all substitutions are outlined below in the "How To" section.
1/4 cup Butter 
2 tbsp Tapioca starch
1 cup Milk
1/2 cup Water
3/4 tsp Salt
1/8 tsp Pepper
2 cups uncooked Macaroni noodles
1 cup grated Cheese

How To
1.  Fill a large pot half way with water.  Using stove top bring to a boil on high.
2.  In a smaller pot, melt the butter on low-medium heat.  Substitution: Instead of butter, use 1/4 cup of margarine.  Or 1/4 cup of lard with a dash of salt. 

Oops. The starch was added too soon as the butter is not yet melted!
3. Once the butter (or substitute) is melted and bubbling, whisk in the tapioca starch.  Substitution:  Instead of the tapioca starch, use 3 tbsp flour.  Or 2 tbsp corn starch.  Or 1 1/2 tbsp potato starch.


I love the tapioca starch as it gives the cheese sauce some delicious 
ooey gooey cheese stringiness!
It can be purchased from the baking aisle in Walmart or in any bulk food store.

4.  Once the large pot of water has reached a boil, pour in the uncooked noodles.  Turn down heat to medium-high and continue cooking.  Stir occasionally until noodles are soft.  Substitution:  Instead of macaroni noodles, use any noodles you have on hand.  Cut spaghetti noodles work great!  Or egg noodles.  Or rice noodles.  Or corn noodles.  Or cubed boiled potato.  


In the past I would use a boiled potato, instead of macaroni noodles, for Evalynn.  She needed to be off all wheat, rice and corn for 6 weeks while we figured out all her food allergies/intolerances. 

5.  After allowing the butter (or substitute) and tapioca starch (or substitute) to bubble for a few minutes, whisk in the milk and water.  Substitution:  Instead of the milk, use 1 cup of any milk alternative you prefer.  Rice milk, soy milk, or almond milk are also possible.  


I use lactose-free milk in all my cooking and baking.


6.  Whisk the salt and pepper into the sauce.  Turn up the heat to medium and bring to a boil.  Continue whisking once a minute or so until a boil is reached.
7. Once boiling, remove the sauce from heat.  Whisk in the grated cheese.  Continue whisking until all cheese is melted and combined evenly in the sauce.  Substitution:  Instead of cheddar cheese, use 1 cup of grated mozzarella cheese, sharp white cheddar, marble or soy cheese.


8.  When noodles are soft, remove from heat and drain the water.  Pour sauce over noodles.  Stir to combine.


  Serve!

Macaroni and cheese is so delicious and easy.  
It works as a glorious side dish.  Your kids will be licking their plates!  Or as a main dish by sprinkling on some bacon bits, ground beef or hot dog pieces.  Your spouse will be licking his plate! I hope you are inspired to make this at home for your family tonight.


Happy thoughts,
Andrea 


Wednesday 30 March 2016

How To Paint with a Toddler - and not loose your mind!


I love toddlers.  I truly do.  And I'm told this is a rare trait.  

I'm not a baby person.  I'm a toddler person.  Rare.  I know.  

I love watching my daughter explore her world.  I love seeing the world through her eyes.  Yes she can be difficult.  Yes she has tantrums.  And yes she occasionally has them in public.  I still absolutely LOVE the toddler stage.  Over several blog posts I will share with you why I love the toddler stage.  My hope is that, if this is a stage in the parenting process where you struggle, you will be able to see, understand and enjoy toddlerdom as I do.  Or at least be able to tolerate it. *smile*

Painting with a toddler is a ton of fun!  I've been complemented many times on "how brave" I am to bring paint around a toddler.  And I'm not just talking about finger painting.  It really never occurred to me that painting, with a toddler, was something to be afraid of.  And yes I hate messes!  Over the years I've learned tips and tricks that take the stress out of painting with a toddler.  It can be a fun and relaxing experience for both you and your toddler.  I decided to categorize these tips under "DO" and "DON'T".   This makes them simple and straight forward.  And I love both simple and straight forward.


Painting with a Toddler

DO
1.  Plan ahead.

Gather all the items you'll need for painting ahead of time.  Toddlers are notoriously impatient.  (Even more than adults!)  If all the supplies are together and ready to go, you've already taken the stress out of "set up".
In a cupboard: Paint, brushes, paper and smocks
The items I recommend having gathered together are:
paints - of various colours, 
paint brushes - multiple small brushes for their small hands,
paper - either paint specific paper or regular writing paper.  Both are great,
smock/apron - to protect their clothes,
painter's tape - to tape down the edges of their painting.  Either to the table or the floor,
plastic lids - to be used like a painter's palette,
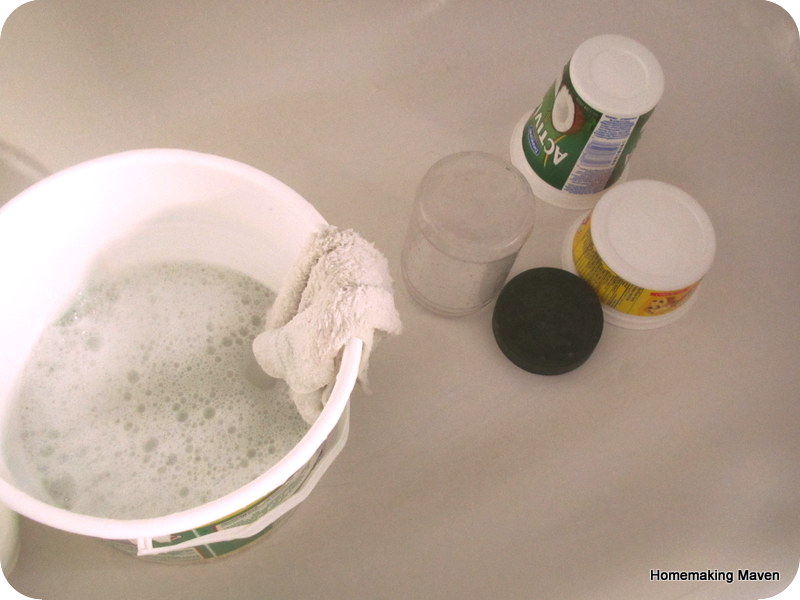
cloth and bucket - to wash hands, the table and anything else!

2.  Choose the proper paint.

Be sure the paints you choose are water based.  This will insure an easy clean-up and decrease the chance of stains on clothes.  Any paints that contain acrylic or latex will adhere to clothing permanently.

Water colours vs. washable colours

Water colours (pictured above on the left) are a beautiful medium but not recommended for toddlers.  A toddler simply doesn't grasp the concept of first dipping their brush in water and then the paint.  Even a three year old will struggle with this idea.  To prevent stress for both you and your toddler, I recommend using small pots of washable paint (pictured above on the right).  They can be purchased together or individually at general stores, art stores or the dollar store.  Using washable paints affords you the luxury of a quick clean up and tossing any accidentally painted clothing into the wash without issue.


If you do purchase large bottles of washable paint, pour a small amount onto a plastic lid (from a sour cream container or the like).  Use a different lid for each different colour.  This will prevent mixing.  If you'd like to show your toddler the joy of mixing paint, then feel free to pour small amount of different colours onto the same lid.  Be warned: it may become a fun time of paint mixing and not actually doing any painting.

3.  Clear the area of anything you don't want painted.

In the beginning I would keep a cup of water or juice and food for the kids to drink while they painted.  If you don't want something painted or knocked over, prevent the stress and keep it away!

4.  Tape their paper to the table or floor.

This tip will prevent many headaches and stresses.  Having the paper taped in one location will also help keep your child (and the paint!) in that same location.  I often choose the table top instead of the floor as it prevents stepping on the painting by the child, our pets, or myself.  


You may also choose to cover your table or floor with newspaper or a drop cloth.  I have done both of these in the past and have found them to be of greater effort than simply wiping it all clean with a cloth at the end.    

5. Have one brush per colour.

Another concept that toddlers have a hard time grasping/remembering is to rinse their paint brush between colours.  A toddler will happily go from paint colour to paint colour without rinsing their brush.  They get caught up in the creative fun of painting and either forget or don't understand that their brush needs to be cleaned so as not to mix the colours.  If you don't mind the colours being mixed than simply disregard this tip.  I, on the other hand, go insane!  Save your sanity by simply having many small brushes.


6. Line up the paint pots at the top of the painting.

This is the best tip for preventing messes.  If the paints are kept to either side of the child, they will eventually knock one over.  By keeping them at the top of the paper any knocking over will occur onto the paper thereby preventing a mess.  Only using paints that have been poured out onto reused lids will also prevent paint from being knocked over.

Paints kept above the painting.

7.  Attach your toddler's apron in this manner:


A large neck hole is a must for any apron or smock used.  If using an apron, prevent the front from pulling down by threading the waist strings through the neck hole at the back.  


8. Expect a mess.

This will happen.  There will be a mess.  At some point in time, paint will be spilled.  Paint will get on their hands.  Maybe even their face or hair.  Expect it.  Have a cloth and/or a small container of soap and water ready for when it does.


9.  Expect them to purposefully paint themselves.

Toddlers are naturally curious.  They visually see the paint on the paper and they want to know what it feels like.  They want to touch it.  It's all part of the learning process.  Expect it and let it happen.  Draw the line at letting them taste it.


You can even encourage them to paint their hands and create hand prints.  Grandparents love to receive hand print art from their grand kids.  This Mommy loves it too! 


10.  Display their art.

It will give them pride in their work.  When they're done, simply peel the tape and painting from the table/floor and adhere it to the wall to dry.  I often add a small piece of tape at the top of the painting to prevent the paper from curling.  If your child has used copious amounts of paint, allow the painting to dry flat for an hour or two before taping it to the wall.  The fridge front is another great place to display their art.


To prevent an overwhelming amount of artwork on your walls and fridge, replace old painting with new ones weekly or even daily.  Saving old paintings to show them when their older is fun.  You could also put old paintings into frames and hang them permanently in your home, give them as gifts or re-purpose them into cards or wrapping paper.  Last year I used some of the children's artwork to create calendars for grandparents.  They were a real hit!

DON'T

1.  Don't expect it to be easy.

Although I have given you all the tips and tricks I can think of, do expect some difficulties.

There will likely be a few battles.  But they will only truly be battles if you make them battles.
For example, they may not want to wear their smock.  When my daughter Brooklynn was younger, she refused (as toddlers sometimes do) to wear a smock, so I made sure she was wearing clothes that I didn't mind becoming stained with paint.  Or sometimes I'd let her paint topless.  Her clothes can't become stained if she's not wearing any!
Or they may not like the feeling of paint on their hands.  Or want it to touch their clothes.  Simply have a cloth at the ready.  Don't argue the reality that using paint may cause paint to be on them or their hands.  Instead teach them to remain calm in a stressful situation.  Help them by remaining calm yourself, gently hushing their alarms and reassuring them that all will be well by wiping up any mess with the cloth.  Look them in the eye and say "all better".  It builds their trust in you, keeps the situation stress free and prevents the development of fear in your toddler. 

Brooklynn washing her own hands after painting.


2.  Don't expect a Rembrandt.

Or a Picasso.  Maybe a Jackson Pollock.  A toddler is mostly exploring colour when they paint.  Not so much form.  They paint "scribbles".  Which is perfect for their development.  As they age into Preschoolers they'll began to attempt to recreate the shapes and images they see around them.  For now they're learning the medium of paint through experimentation.  And would doesn't love experiments?!  Let them.  You may be surprised at how beautiful their artistic expression will be.

3. Don't expect this activity to occupy your child for hours.

On average the whole act of painting with a toddlers lasts about 15 minutes.  Sometimes less.  They may spend more time if they've discovered something that is fascinating to them (such as mixing paints, painting their hands or using different brush sizes) but it still doesn't last long.

4.  Don't give up!

If you have a disastrous experience, don't give up.  Look back at the experience and take note.  Learn from your mistakes, makes plans to avoid them in the future and try again.  And don't forget your child will grow up.  They won't be a toddler forever.  And they'll learn from mistakes too.  So don't give up!


Creating art and memories that will last a lifetime.  

Share your thoughts, experiences and tips below or here:
on my Facebook page.

Happy thoughts,
Andrea


Tuesday 1 March 2016

How To Freeze your Spending - The Final Week


Welcome to the weekly Spend-Freeze update.  On February 1st 2016  I posted what a Spend-Freeze is all about.  I outlined the rules we will strictly follow for the rest of the month.  The purpose is to stop our needless spending and save money. 


Week Four - The Final Week!

We did it!  We lasted four weeks (plus one day) on our Spend-Freeze!  The whole month of February!! Well, mostly.  There were a couple of bumps in the road.  A couple of cheats.  But they were minor.  We corrected ourselves, got back on track, and saved some moola.  Woohoo!  I'll share the break down of what we were able to save in a moment.  First, how did we manage in our last week?


We ran out of many things.  We ran out of juice for the kids.  We ran out of eggs, ketchup, fresh fruit (minus bananas), fresh veg (minus carrots, potatoes and squash), crackers, baby wipes and packaged snacks I use for the kid's lunches.   We came precariously close to running out of toilet paper, peanut butter and diapers (again!).  The fridge, freezer and cupboards were looking bare.


Food

Monday - Macaroni and cheese with ham and cut carrots and pickles
Tuesday - Chicken with Potato fries and Squash
Wednesday - Ham and White bean soup
Thursday - Potato soup
Friday - Pancakes with Sausage and canned fruit
Saturday - Invited over to eat with family
Sunday - Chili
Monday - Chicken with macaroni and cheese, cubed squash and carrots

Not only were we running out of food (and meal options!) but we also received results from Jackson's blood test.  He had been suffering from tummy pains for several months.  Doctors ruled out appendicitis but not the cause of the pain.  He was sent for blood and stool tests. The results showed a high intolerance for 20 different foods including wheat, oats, milk, eggs, rice, and legumes (which include peanuts).  Not to mention his pre-existing soy allergy.  This was difficult news.  Poor kid cried when I told him we needed to cut out many foods he loved.  What was I going to feed him?  Thankfully I had a few cups of dark rye flour on hand.  I was able to make him a loaf of bread and some pancakes.  He was happy again once he knew he could have pancakes.  Just two days after cutting out all intolerances he stopped complaining of tummy troubles.  We no longer needed to dose him daily with Tylenol and Advil.  And his anxieties (fear of the dark and fear of being alone) subsided too.  Though it has been trying, having answers and developing a solution were far better than the constant pain.


Shopping

In the past I worked in retail.  All forms of retail.  Including a grocery store.  I know all the tricks of merchandising products to entice customers.  These tricks are known to most of us. Yet we fall for them all the time.  I am as guilty as the next for making impulse purchases and  I knew going to the store for the first time in a month would make me more vulnerable to doing so.  Having done without for a few weeks strengthened my desire to purchase items, not dampen it as I had thought.

On my first shopping trip (this morning March 1st!) I didn't want to undo all the hard work we'd done this month.  We'd done without so we could save money.  I didn't want to "make up" for the lack of spending by going spend-crazy.  The best way to do this was to ease in.  I decided to purchase only a few items that we were out of and really needed.  I wrote out a list and stuck to the list.  I bought apples, juice, ketchup, toilet paper, more bananas, diapers, wipes and some pharmacy items.  I did impulse buy fresh strawberries and cucumbers.  I will grocery shop again on Saturday (my usual shopping day).  Overall I spent less than $50.  I hope I can maintain this level of spending control for a while yet.


Emotions

This last week was more emotionally difficult than I expected.  Because I felt poor.  I really had to work to plan out our meals with what we had.  I knew I couldn't go to the store.  And it made me feel poor.  This week was likely more difficult for me since I've experienced poverty before.  When I was growing up my family and I lived below the poverty line for a time.  It reminded me of those times.  Of course my current situation was created by my own limitations.  My own imposed rules.  We had money in the bank.  I had money I could spend.  This week broke my heart for those who don't.  It broke for those who are truly struggling to make it to the end of the month on the little income they have. 

I watched the documentary "Kelly and her sisters grow up" on youtube about a Mother in the UK struggling to make ends meet for herself and her kids.  I found it very insightful.  I've never had to deal with poverty that severe.

When I went to the store this morning I thought I would feel elated.  I thought I would be so very happy to be able to shop again.  Instead I felt pulled to buy as much as I could.  I felt I should stock up on anything and everything in that store.  I guess I felt as a starving person would feel if they were suddenly put in front of a buffet.  I needed it all!  I needed to take it all!  Are these survival instincts?  Is that what I was feeling?  Though I was not starving, I felt deprived and so had a strong desire to overindulge so I could bring myself back to balance.  It was a very odd feeling.  A feeling I had to work hard to keep in check.


Money

So how much did we save?  After all that was the point of this month.

We saved roughly $720!!

This is a rough amount because we have set our bills up for automatic payment.  That means there is money being pulled out of our account each week of the month to pay for different services (car insurances, heating bill, electricity bill, etc.).  We saved more last time we completed a Spend-Freeze because we were spending much more in a month than we do now.  I've worked hard to lower our grocery bill and other spending.

We'll use the money we saved to pay for a new bathroom.  Read this post for more details on the state of our current bathroom.


In Closing

Yes we saved money!  Yes we get a new bathroom!  It was worth doing without and sacrificing for one month to accomplish our goal.

If you are thinking of trying a Spend-Freeze, I recommend that you do!  If you're a bit nervous, try doing a one week, two week or three week Spend-Freeze first.  Ease yourself in.  I do find the best way to do something is to go all in.  Gather courage and jump in!  Pull the band-aid off in one quick motion!  You can do it!! And you'll be glad you did.

Happy thoughts,
Andrea


What will I do with all the side benefits and emotions caused by this Spend-Freeze?  I don't know.  I'll need some time to think through and contemplate all that I've felt and learned this month. Is God leading me to something?  Somewhere? I don't know.  Only He and time will tell.  God bless!


If you would like to receive regular blog updates
be sure to "Like" my Facebook homepage here:


Links

Saturday 27 February 2016

Cleaning Series: How To Clean the Bathtub


< Singing to the tune of "Sailing, sailing">

Cleaning, cleaning.
Off the tub we go!
Scouring grout without a shout
A shining tub to show...


Isn't cleaning fun?
*smile*
Maybe I'm the only one.

I like to view my weekly scrubbing of the bathtub as exercise.  It's good for me (I sure feel it in my arms and hamstrings some days!).  And good for the tub!  I know that you will likely be able to scrub your tub much faster than I can as my tub has some issues.  First, the grout is almost non-existent.  There are large gaps where the grout should be.  Which means that pink goo (red algae) and mildew like to try and grow on these mini shelves.  Yes we could add more grout and solve the problem but we're saving up to put in an all new bathroom.  We don't want to redo the grout just to pull it all out and bin it in a month's time.  Secondly our tub was neglected (by previous home owners) so the bottom of the tub is stained.  Each week I scrub I am slowly wearing down the stain more and more.  I view it as a game.  How much stain can I scrub out this week!?  I'm also motivated by my husband who is always impressed by how much cleaner the tub looks each week.  Yes he may be pretending to be impressed but I don't care.  Someone noticed my hard work and that makes me happy!

My gross stained tub.

Here's how you too can clean your bathtub in less than 10 minutes:


Supplies (ABCD...)

Abrasive Cleaner - homemade (click here for recipe) or store bought
Bucket
Cloth/sponge/rag
Dish Soap
Gloves (optional)
Old towel
Small container/cup
Squeegee (for glass tub surrounds)
Timer
Toothbrush - re-purpose an old one


How To

Set the timer for 10 minutes.  Squirt a small amount of soap in the bucket and fill with water from the tub.  Set aside.  Start the timer!  It's a race against the clock!  Who will win!?

In 3 Minutes
1.  Remove all toys, soaps, shampoos and other items from the tub surround.  Minimize these items as much as possible.  Algae and mildew like to grow behind and under them.  
2. Using the small container/cup, collect water from the tub faucet and splash it around the tub.  If the tub walls and tub itself are already wet, omit this step.


3.  Dump a small amount of abrasive cleaner on the tub bottom.  Using your cloth/sponge/rag scrub the bottom and sides of the tub.  Scrub around the drain, the tub edges where it meets the wall and scrub the drain plug. 


4.  Using your cloth/sponge (which should now be infused with abrasive cleaner) scrub the tub faucet, tap, and shower head.


In 5 Minutes
1. Pour a tiny pile of abrasive cleaner on the bottom of the tub.  Dip the old toothbrush into your soapy water bucket, then into the cleaner.  Scrub the grout lines between the tub tiles and any soap shelves.  Start at the front of the tub (by the faucet) and work your way up.  This way you clean the dirtiest grout first and work your way up to the least dirty.  Repeat dipping the toothbrush into the water and cleaner as needed.  Spend most of  your 5 minutes scrubbing the grout.

If you have have a glass or vinyl surround on your tub, clean any soap shelves and move on to step 2.


2. Wipe up the last of the abrasive cleaner with the cloth/sponge.  Wipe/scrub the tub surround surface (vinyl or tile).  This can be done quickly using a large wiping motion.

If you have a glass surround wipe it down by dipping your cloth/sponge into your soapy water bucket.   Then wipe with a squeegee to prevent water spots.  


3. If your tub is in a sorry state (like mine!) and there is time remaining, return to the task of scrubbing the tub bottom for a few moments.

In 2 Minutes
1. Using your small container/cup and water from the tub faucet, splash the water against the tub surround and tub.  Repeat until tub and surround are rinsed from all cleaner.


2. Wash any tub toys or shampoo/soap bottles using the bucket of soapy water.  Leave items on tub bottom to dry.

Currently our tub toys are plastic food containers.  Our kids loves filling and pouring with them.


3. Rub the tub faucet,  tap and shower head dry with the old towel. This removes water spots and makes them sparkle and shine!


Yes!
You did it!

You beat the clock!!


You're so awesome.  I knew you could do it!  If you still have time and energy, go ahead and tackle the rest of the bathroom.  It will only take 10 minutes (or less!).  Click here to connect to that article.
Or sit back and enjoy your shiny bathtub.  Love that shine!

Happy thoughts,
Andrea


If you would like to receive regular blog updates
be sure to "Like" my Facebook homepage here:


Thursday 25 February 2016

How To Make the Best-Ever Oven Fries


I love this recipe.  
It is simple, easy and adaptable.   
Love it!


Can you smell the deliciousness?!
*deep breath in*
Heaven I tell you.  Heaven.


For me these fries are more than fries.  They're more than hot, fragrant, yum-yum-in-my-tum potato fries.  They're a side that my whole family can eat.  Hallelujah!  There seem to be fewer and fewer foods we can all eat as a family.  We have many food allergies.  Argh.  But the mighty potato has always been a friend. *smile*  Baking the fries also gives me peace of mind over deep frying.  I'm giving my kids something they love in a healthier way.  It is also saves on money verses deep frying (the cost of oil).   And it  definitely saves us money verses buying them from the store or a fast food joint.

Old potatoes make GREAT fries.

Ah. 
*happy sigh*
 Potato Fries.
  Are you ready to enjoy all the deliciousness?  
Here's how:


the Best-Ever Oven Fries

Ingredients
7  Potatoes (tennis-ball-size)
1 tbsp Cooking Oil (We use Canola oil)
1/2 tbsp Salt
A couple dashes Herbs/Spice (optional - choose your favorite )

How To
1. Wash potatoes.  Remove any eyes or bad spots.  You can peel your potatoes or leave the skin on.  Most often we make skin-on potato fries.
2. Cut the potatoes into fries.  I find the easiest way is to cut the potato in half  then cut the half into three or four strips.  


3.  Preheat oven to 425 F.
4.  In a bowl, toss the cut fries with the oil, salt and herbs/spices.  Our favorite spice to use is paprika.  We sometimes add pepper, garlic or dried parsley.  Try different herbs/spices to jazz up your oven fries and complement your meal.


5. Turn out fries onto a lined baking sheet. We use a washable silicone liner, but you can also use wax paper or parchment paper.
6.  Bake at 425 F for 45 minutes.  Flip the fries every 15 minutes to ensure even browning on each side.  Fries can be cooked for up to 1 hour.  This will add crispiness.  Any longer and they will be hard and crunchy.


 7.  If you have other foods to cook in the oven, slide them in above the fries.  The fries will still crisp very well.  Our favorite is to have chicken and cubed squash with our oven fries.


Chicken thighs, cubed butternut squash and oven fries all cooking together at 425 F.


Eat and Enjoy!

You just can't beat Best-Ever Oven Fries.
Yum-Yum!

Happy thoughts,
Andrea


Please leave any questions/comments below 

God bless!