Monday 31 August 2015

How to Hang Laundry - Kid's Clothes


Kid's clothes can be tricky!

There are small, odd shapes and there are a ton of them!

        My kids could make a load of laundry a day if I let them!  Jackson has an obsession with wearing at least two layers of clothes every day regardless of the weather!!  If it's cold he wears shorts under his pants.  If it's hot he wears his long sleeve shirt under his t-shirt.  
       Brooklynn would love to change her outfits 4 times a day.   And she has plenty to choose from: shirts, skirts, shorts, dresses.  Dresses that look like shirts.  Shirts that look like dresses.  Not to mention leggings.  Oh the leggings!! 
       Evalynn's favorite places to play are the sand box and the kiddie pool.  Usually a combination of both.  If she can create a kind of sand-mud-soup that is her favorite!  And so she goes through at least two outfits a day. 

       Having washed and hung a bazillion (Okay...maybe only a million) little articles of child clothing, I have discovered methods to keep Hanging Kid's Laundry a simple and easy task.


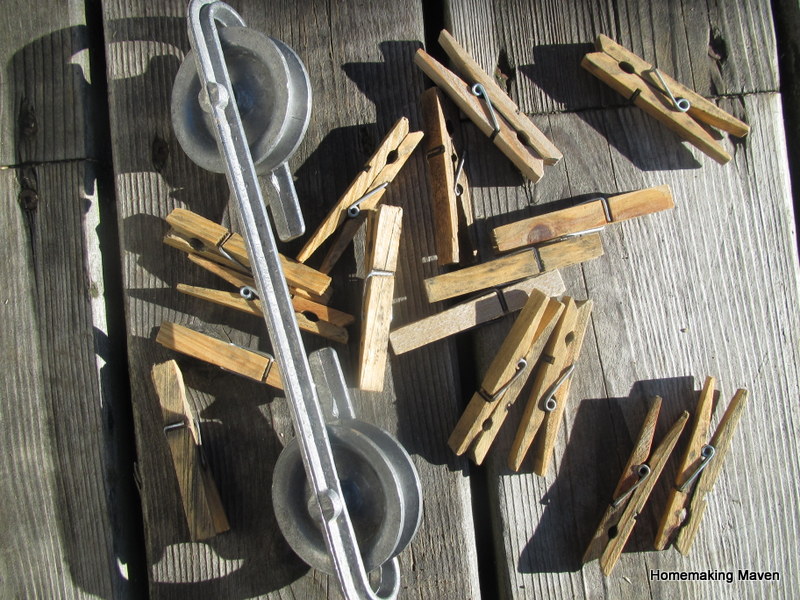
 See my post about the Proper Tools to hang laundry here.

As always I sort the clothes into small piles in clothes basket (laundry hamper) I'm using.
This helps with hanging the clothes more efficiently and quickens folding when I take them down.
A win, win!! *smile*

Shirts: Are easy and straight forward.  The best way to hang shirt is upside down.  The reason is two fold.  First it eliminates stretching and clothes pin marks at the collar/shoulders of the garment.  Being that the stretching happens at the neckline of the garment, it is very noticeable.  Once a shirt is stretched and dries in that manner it is hard to shrink it back into shape.  Pinning the shirt at the bottom is the solution to this problem.  Secondly it prevents colour fading.  Should the overhead sun fade the garment it will fade it at the bottom only.  I have never noticed fading at the bottom of a shirt but I certainly notice it when it fades at the top!

To conserve clothespins I slightly overlap shirts at the corners and use one pin.  When you have a long line of tiny kids'  clothes you'll want to conserve as many pins as you can!  I have never had a problem with the corners of the clothes not drying.  They always dry evenly.


Pants: Children's pants are also very easy.  Most of their pants are cotton (or cotton blend) with an elastic waist.  I simply fold the elastic waist portion over the line and stick on with one clothespin. Elastic-waisted pants are the fastest items to get on the line!  I hang underpants the same way but I didn't not photograph my children's underwear.  (I just didn't think that was a good idea.)  For thicker pants, such as jeans or khakis, the pants need to be opened and the clothespins clipped inside the pants along the waist band.  The picture below illustrates this perfectly!!  A picture is worth a thousand words! *grin*  Drying the pants in an open-manner like this allows them to dry more quickly.  It always bothers me when everything is dry on my clothesline at the end of the day except the pants. 

 
 Socks: Little socks are always a trial.  They are tiny and my fingers are not!  They are finicky little things but I've discovered the secret of getting them to dry fully and  not be misshapen from being hung to dry.  The secret is simple!  Hang the socks together!! Pinch the inside top of the pair together, sandwiching the clothesline between them, and secure with on clothespin! *yes, yes, yes!  Punching the air with my fists!* Can you tell I'm excited about this discovery!? Again a picture is worth a thousand words.  See below to understand to action I'm trying to put into words.  Hanging the socks like this allows them to dry straight (without crinkles!) and makes folding them a breeze!

 Dresses and skirts:  I hang skirts in the same manner as pants.  If the skirt has an elastic waist I simple hang the waist over the line and clip with one clothespin.  If the skirt is of a thicker material, like a pleated wool skirt, I open it up and clip the inside back waist band with two clothespins.


Dresses I hang by the top seem as close to the shoulder as possible.  I hang the top of the dress slightly over the line.  Really just the back of the collar.  This prevents the "pinch" that the clothespins can leave behind.  The photo below helps to show what I'm trying to explain.


Baby Items: The trickiest clothing items by far! The quickest and easiest method is simply to hang them by the top seem as close to the shoulder as you can (in the same manner as dresses above).  I hang sleepers and onsies with buttons or zippers undone.  I hang mine this way because that is how I fold them.  When I pull one out of the drawer I want to quickly put the baby in and not bother undoing all those buttons or zippers I'd done up during folding.  Bibs I hang by their clasps.


 When the clothes are dry I fold them as I take them off the line. 
 I love the starched quality line-dried clothes have. 
 It makes folding so easy!  (More on folding soon!!)


I wish you much success and ease 
line-drying your children's clothes!!!


I also have my sweet Brooklynn as a helper from time to time.  I am blessed!
Until next time!

Happy thoughts,
Andrea

If you would like to receive regular blog updates
be sure to "Like" my Facebook homepage here:


Delicious Homemade Macaroni and Cheese


This is one of my favorite recipes!!!

My kids LOVE this recipe!  And so do all their friends!! *big grin* 

 It's simple, easy and takes only 15 minutes.

Let's get started....!!!


 Ingredients
4 Tbsp butter
3 Tbsp flour

2 cups macaroni noodles

1 1/2 cups milk (we use lactose-free)
1 tsp salt (scant)
1/8 tsp pepper

1 1/4 cups shredded cheese (white cheddar is our favorite but any hard cheese will work)

How To
1. Half fill a medium pot with water and put on high heat to boil. 
2. Place butter in a small pot and put on low to melt.  Once melted whisk in flour.  Continue to cook 1 minute or until bubbling.


3. Water should now be boiling.  Add macaroni noodles to water and turn down to medium.  Stir occasionally with spatula to prevent noodles from sticking to bottom of pot.
4. Whisk milk to bubbling butter-flour mixture.  Add salt and pepper.  Turn up heat slightly.  Continue to whisk occasionally to prevent milk from burning.  Cook until thick and bubbling, approximately 5 minutes.

5.  Whisk the shredded cheese into the thickened sauce until melted and well combined.  Remove from heat.

6. Drain noodles once cooked  (should be finished cooking within minutes of the sauce being completed) and place in serving bowl.  Using the spatula scrape the sauce from it's pot and add to the noodles.

Option: add more shredded cheese to garnish serving bowl or plates.


I know you'll love this recipe!  And your kids will love it too!!  We make it at least once a week (sometimes more!!!).  A great stand-alone dish for lunch or as a side for supper.


 Remember to visit again for more wonderfully deliciously and easy dishes !
*big smile*


Happy thoughts,
Andrea

If you would like to receive regular blog updates
be sure to "Like" my Facebook homepage here:


Friday 21 August 2015

How to Make Dishwasher Tabs


As with most things I love being able to make these at home.  
If ever I'm running low I just need to whip up a batch.  

They only takes 5 minutes to create! 
Much faster than running out to the store.


Before getting started you will need an ice cube tray.  BUT not just any ice cube tray.  The cubes created must be small enough to fit inside your dishwasher's soap dispenser.  I went to the dollar store and found trays that were perfect.  I even got two for my dollar!  *happy smile

Dish washer tabs are super simple and easy to make.  I lived in a community with very hard water and found the recipes available online didn't work for me.  They always left spots or white residue behind on the dishes.  I experimented with different ingredients until I found a recipe that worked every time.  We recently moved to a new area with softer water.  The tabs still work like a dream.
Here's how to make them yourself:

Dishwasher Tabs

1 cup washing soda (found in the laundry aisle)
1/4 cup kosher salt/pickling salt/coarse salt
1/4 cup hydrogen peroxide
some liquid dish soap

vinegar (this is a must. Makes the dishes sparkle!!)


How to
1. Mix washing soda and salt in a bowl.  Add the hydrogen peroxide and mix together quickly.  Mix until completely combined and resembles wet sand.
2. Using an ice cube tray, pack each compartment half full with soda/salt mixture.  Push down firmly with thumb or index finger.
3. Drizzle a small amount of dish soap into each half filled cube to create a small line of soap.
4. Fill cubes with remaining mixture.  Pack firmly.
5. Allow tabs to dry for four hours (less if you live in a very dry climate).
6. Pop dishwasher tabs out of ice cube tray as you would ice cubes. Store in water-tight container.
7. To use tabs, place into soap dispensing square in dishwasher door and fill dispensing square with vinegar.  Close dispenser door.  Close dishwasher door and turn on. 

Tips Always put vinegar in with the tabs (about 1/4 c per tab).  Do not use delay start (the chemical reaction between the vinegar and soda will cause all the soda to be used up and leave none to clean your dishes!!).  And if you have any leftover soda/salt mixture, save it!  You can use it in place of a scouring detergent (such as Comet).

Thank you for joining me today!

Happy thoughts,
Andrea

If you would like to receive regular blog updates
be sure to "Like" my Facebook homepage here:

Butter Pie Crust


Delicious, delicious pie!!

Peach pie!!!


While I'm still working on the perfect peach pie filling, I've found a fantastic butter pie crust.
Of course it was created by the folks at Land O'Lakes butter company. 
You can find the wonderful recipe here.


I will posting my own pie crust recipe soon.
It's delicious, flaky, easy and inexpensive!!!
A plus, plus, plus and plus. *big smile*


See you again soon!

Happy thoughts,
Andrea

If you would like to receive regular blog updates
be sure to "Like" my Facebook homepage here:


Wednesday 12 August 2015

How to Hang Laundry - The Proper Tools


I know, I know...

Who doesn't know how to hang laundry!? 
 Is there really a secret?  
Is there really more to know than just using clothes pins and a clothes line?

Surprisingly...
YES!!


If you've ever taken rigid towels off a clothes line or socks that have dried in a mangled mess  then you know that you can't just throw clothes on the line.  You need to have a plan.  A guide.  Who helps make hanging laundry easy (and happy! *smile*).

After years of trial and error (and observing my awesome neighbor who has been hanging laundry for decades!!) I've discovered the secret of perfectly hung laundry - no matter what you're hanging!


 The Proper Tools


You can use any kind of line for a clothesline.  It can be a rotating line (such my outdoor line) or a stable line (such as my indoor line).  As long as the line is strong enough to take the load of heavy wet clothes any line will do.  Nothing is worse than having your line break and all your lovely clean laundry fall to the ground.  Sadly I speak from experience.  Sad times.

There are many different kinds of clothes pegs.  I use two kinds.  The standard wooden peg with metal hinge and a strong plastic peg.  Both sets were bought from the dollar store.  I recommend owning at least two sets.  You'll be surprised how many pegs are needed to hang just one load of laundry - especially the itty bitty baby clothes.  I love my wooden ones as they can take a ton of abuse.  If the strain is too great they pop apart and easily pop back together.  I love my plastic pegs because they can take almost a ton of weight.  I use them for heavy towels, jeans and the like.  I keep my pegs in a plastic container with a lid.  It helps to keep the pegs dry as I store them outside all summer.  I know many people use a cloth bag for storage.  Whatever works best for you.

And don't forget the clothesline spacer!  This is very important if you are using a rotating line.  It keeps the line taught, preventing sagging and potentially breaking.  And as I've said before, a broken line sucks.  I have two kinds of spacers.  Small ones with plastic rollers and a large metal one.  I prefer the smaller one as it keeps the line tighter.  I've had them over two years and the rollers have not broken or cracked.  I've had my metal spacer for 5 years.  It will never break but the rollers squeak.

At my clothesline I also have a small table.  The main purpose of the table is simply to hold my clothes pegs at the proper height but I use it often for sorting clothes and folding them (more on that later).  Before this table, my husband had his 4-wheeler parked so I could use the back end like a table (Ha ha! Whatever works!! Right?)

These tools are simple and easy to find at any hardware or general store.  They are also easily within any budget.  Even if you have room for only a small clothesline on your balcony or hanging in your bedroom, I recommend doing it!  Not only will it save you money and save energy but it will also lengthen the life of your clothes!! *big grin*


Happy thoughts,
Andrea

If you would like to receive regular blog updates
be sure to "Like" my Facebook homepage here: