or "How
To Cook a Pumpkin"
This is delightfully
easy!
I do this every year
with our pumpkins.
You can use any
variety pumpkin you'd like.
Not JUST the
"Pie Pumpkins" they advertise in the store.
You can cook up and
eat the carving pumpkins too.
This is what we do.
They're much less
expensive.
(Shhhh.... Don't
tell the grocery stores I said so.)
The only difference
is the taste.
And honestly they
taste so similar
we don't notice the
difference.
At Halloween I allow
the kids to carve one pumpkin
then I let them paint
the rest.
The paint is
washable.
The only kind of
paint to have when you have small kids!
Sadly pumpkins begin
to rot once carved.
Even if your area is
relatively cool through October
(as ours is in Northern
Ontario )
the pumpkin needs to
be kept intact until it is cooked.
Pumpkins are
wonderful things!
They can store
outside for months before you bake them.
It really is
wonderful because my to-do list is so long in the fall,
it helps that I can
ignore the pumpkins until I have a bit more time.
 |
| Under a blanket of snow? Yep. Still good! |
Need
1. A pumpkin (any variety, any size)
2. Roasting pan with lid.
3. Blender, food processor, or hand blender.
4. Freezable container or freezer bags.
5. Spatula
6. Permanent marker
How To
1. Cut the pumpkin in
half. Scoop out and remove the seeds. The seeds can be saved, cleaned, roasted and eaten!
 |
| Pumpkin seed cluster |
 |
| Scooping out the pumpkin with a spoon. |
2. Place the
pumpkin cut side down (skin side up) and add 1/4 cup of water. Cover with lid.
3. Bake in the oven
at 400F for 45 minutes.
4. Check pumpkin doneness with a fork. It should easily pierce the flesh of the pumpkin. If the pumpkin is still firm, bake for an additional 10 minutes. Once cooked, remove from oven
and let cool in the pan.
 |
| Before cooking. |
 |
| After cooking. |
5. Carefully turn
over the pumpkin. Scoop out the cooked
pumpkin (leaving the skin behind).
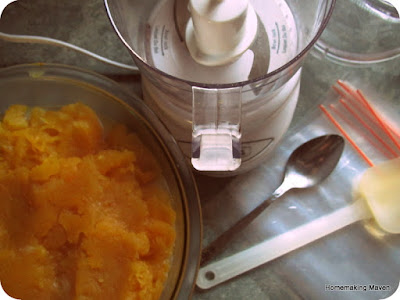
6. Place the cooked pumpkin into the blender or food
processor or upright container if using a hand blender.
Blend cooked pumpkin until a puree consistency is reached. I use a food processor which purees two
cups of pumpkin at a time.
 |
| Before blending. |
 |
| After blending. |
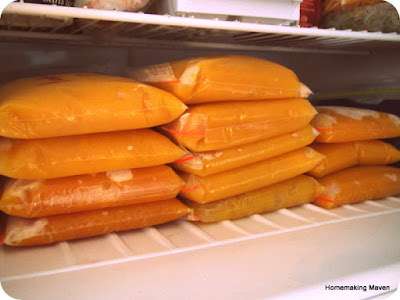
7. Scoop puree into
freezer bags or freezable containers. Label bags/containers with a permanent marker. Lay flat to freeze. I freeze my pumpkin puree into two cup
portions as that is the approximate size of a can of pumpkin puree (and the amount needed for the recipes I use).
And that's it!
That wasn't so hard.
Was it?
To thaw simply take the amount of pumpkin needed out of the
freezer and leave on the counter (or in the fridge) to thaw. You can also defrost it in the microwave. Be sure to squeeze out any water before you
use it in your baking. I often use a
sieve and a fork to squeeze out excess water.
But sometimes I create a small opening at the top of the bag and squeeze
it out by hand. I don't squeeze out any water before freezing as the extra water is needed to help create a smooth puree.
Option: If
you'd like to have spiced pumpkin puree, add 1/2 tsp ground ginger, 1/4 tsp ground cloves and a
dash of ground nutmeg for every two cups of puree you make. I add the spices to my puree just before I add to my baking.
Happy pumpkin puree
making!
Happy thoughts,
Andrea
Andrea
If you would like
to receive regular blog updates
be sure to
"Like" my Facebook homepage here:


No comments:
Post a Comment